

PCB Thickness for Connector and Enclosure Interfaces
Connector and Enclosure Interfaces Set PCB Thickness First
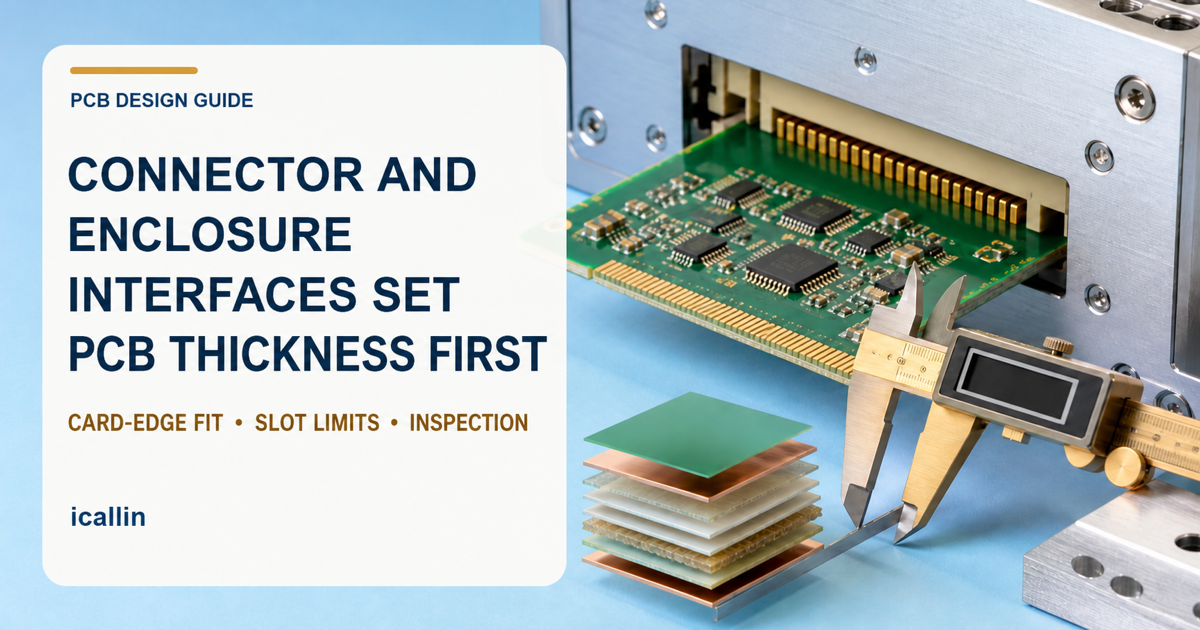
For plug-in boards and tightly packaged electronics, PCB thickness begins as an interface requirement. The card edge must mate with its exact connector, while the finished board must also fit enclosure slots, guides, clips, supports, shields, and thermal interfaces.
The most reliable method is to work backward from those interfaces that cannot move. Freeze their acceptance limits first, then build an electrical stackup that fits inside the remaining envelope. Finally, verify stiffness, drilling, copper construction, tolerance, measurement, and assembly behavior with the selected fabricator. This approach turns board thickness from a generic material choice into a controlled mating and enclosure specification.
Begin with the Interfaces That Fix the Board Geometry
Some dimensions are flexible early in a project, but others quickly become fixed. A card-edge connector accepts a defined mating thickness range. Board guides, slots, clips, gaskets, keypads, shields, heatsinks, and enclosure bosses also create physical limits. If the PCB is too thick, it may not enter a connector or housing. If it is too thin, it may rattle, bow, lose contact pressure, or sit below an intended mechanical datum.
Start by recording every interface that touches or locates the board:
- connector or socket acceptance range;
- enclosure slot, rail, or guide width;
- standoff height and screw or fastener geometry;
- component, shield, thermal-pad, and heatsink stack height;
- required clearance and total product weight;
- inspection method and permitted finished-thickness tolerance.
Use the exact component or connector drawing rather than assuming that a familiar 1.6 mm board will fit. Even when 1.6 mm is common, it is not a universal mechanical standard. The acceptable value must be tied to the actual part number and the assembly drawing.
What an Interface-Driven Thickness Requirement Changes
Increasing finished thickness usually increases bending stiffness for the same outline and material. That can help large boards, heavy components, or assemblies exposed to handling and vibration. The benefit is not unlimited, however. Mounting-point spacing, cutouts, connector loads, component mass, material modulus, copper distribution, temperature, and support conditions also control deflection and strain.
Thickness also influences several manufacturing and electrical decisions, but it should not be treated as a shortcut for unrelated requirements.
| Design question | What finished thickness can influence | What must still be specified separately |
|---|---|---|
| Mechanical fit | Slot fit, stiffness, weight, fastener engagement | Enclosure tolerances, support spacing, shock and vibration limits |
| Stackup | Available space for cores, prepreg, copper, and solder mask | Layer order, dielectric spacing, material system, pressed thickness |
| Drilling | Through-hole depth and via aspect ratio | Finished hole size, plating, annular ring, reliability class |
| Electrical behavior | Possible dielectric spacing and thermal mass | Trace geometry, copper, return path, cooling, creepage and clearance |
A thicker PCB does not automatically carry more current. Current capacity is governed primarily by conductor geometry, allowable temperature rise, environment, duty cycle, via transitions, and the weakest neck-down in the path. Likewise, extra FR-4 thickness does not automatically create a better steady-state heat path. Heat still has to move through copper, thermal vias, interface materials, a chassis, a heatsink, or air.
High-voltage safety also cannot be reduced to total thickness. Creepage, clearance, material, dielectric construction, voltage stress, environment, and the applicable safety standard must be checked separately.
Treat Common Thicknesses as Screening Values
Common nominal values can help screen candidate constructions, but they cannot approve an interface. Thin rigid boards may suit tight card guides or height limits while requiring closer attention to handling, connector force, and warpage. Mid-range constructions around 0.8 to 1.6 mm fit many products, yet only the exact connector and enclosure drawings establish acceptance. A thicker construction can add rigidity, but it can also exceed a slot, alter contact geometry, increase weight, and deepen drilled holes. Measure the finished prototype at the actual mating region before approving the value.
Build the Layer Stackup Inside the Mechanical Limit
Finished thickness is the result of a construction, not a single sheet. A multilayer PCB combines cores, prepreg, copper, plated outer layers, and surface coatings. During lamination, prepreg resin flows into etched patterns and cures; resulting dielectric thickness depends on glass style, resin content, copper coverage, and the approved process.
Layer count does not force one finished thickness. A six-layer design can sometimes fit the same nominal thickness as a four-layer board by changing cores and prepreg, but that choice can alter impedance, resin fill, plane spacing, drilling, and manufacturability. Agree the stackup before controlled-impedance routing is finalized.

High-speed traces respond to local geometry, not total thickness. Microstrip and stripline impedance depend on trace-to-plane spacing, width, finished copper, Dk, solder mask, and etched shape. Total thickness can change without changing one impedance layer, or impedance can move while total thickness stays nominally constant.
Check Copper, Holes, and Assembly Together
Copper adds to the thickness budget, but base foil and finished outer copper are not always the same because outer layers may receive additional plating. If current or temperature rise requires more copper, update both the electrical model and stackup rather than simply increasing total thickness.
For a given finished hole diameter, a thicker board raises the depth-to-diameter ratio and can make drilling, desmear, plating, and inspection more demanding. The usable limit depends on process, material, hole type, copper, and reliability target; no single ratio applies to every build.
Thin boards may need carriers or support tooling during assembly. Thick boards have greater thermal mass and may heat differently during soldering, but that does not mean they cool power components more effectively in operation. Reflow profiling and steady-state thermal design are separate tasks.
Match Thickness to the Operating Environment
Qualification should reflect the product: handheld equipment sees drop and torsion, vehicles see vibration and temperature cycling, and industrial boards may carry heavy terminals or cables. Estimate deflection using the real outline, supports, cutouts, mass, and load direction, then prototype the assembly. Temperature, moisture, coatings, and cycling also affect the material system, so thickness alone is not a reliability rating.
Connector-and-Enclosure Thickness Release Checklist
- Freeze every mating interface. Record the exact connector card range, enclosure slot, guide, support, fastener, height, and weight limits with tolerances.
- Define electrical architecture. Choose layers, reference planes, current paths, impedance needs, and isolation boundaries.
- Request a candidate stackup. Obtain cores, prepreg, copper, material values, pressed thickness, and tolerance from the board house.
- Review local geometry. Recalculate impedance, current, temperature rise, plane spacing, and return paths.
- Review holes and mechanics. Check aspect ratio, plating, edges, slots, deflection, connector force, vibration, and assembly tooling.
- Write an inspectable specification. State finished thickness, tolerance, measurement method, stackup, material, copper, and controlled substitutions.
- Build and measure prototypes. Verify fit, flatness, dimensions, impedance, hole quality, and assembly behavior before release.
Do not leave the fabrication note as “use standard thickness.” A useful drawing identifies the finished value and tolerance and links them to the approved stackup. If a connector or mechanical interface drives the requirement, state that boundary explicitly so a material substitution cannot silently move the dimension outside the usable range.
Frequently Asked Questions
Is 1.6 mm the standard PCB thickness for every design?
No. It is a widely used nominal thickness for rigid boards, but it is not a universal requirement. Connector fit, enclosure geometry, layer stackup, stiffness, weight, drilling, material, and the fabricator's available constructions can justify a thinner or thicker board. Specify the required finished thickness and tolerance for the actual assembly.
How should finished thickness be checked for a card-edge connector?
Define the connector's permitted card range, the PCB nominal value and tolerance, the exact measurement region, the instrument, and the sampling plan. Measure finished production features rather than relying only on a theoretical stackup sum, and confirm mating force and contact engagement with the exact connector. If selective plating, a bevel, or another local feature affects the interface, show its inspection boundary on the fabrication drawing.
Conclusion
For interface-constrained boards, finished thickness is set from the product boundaries backward. Begin with the exact connector and enclosure limits, fit a manufacturable electrical stackup inside that space, and then verify stiffness, copper, drilling, tolerance, measurement, and assembly behavior. Familiar values such as 1.6 mm are screening values, not mating approvals.
A controlled release states the finished thickness and tolerance together with the approved stackup and inspection method. That documentation prevents a seemingly small thickness change from becoming a connector, impedance, via, or assembly problem later in the program.
Need Help With PCB Manufacturing or PCBA Assembly?
Share your PCB manufacturing or PCBA assembly requirements with icallin through our dedicated quotation page.